
How to Clean Wall Cladding Properly Without Causing Damage
Most people don’t think about their cladding until it looks terrible. And by that point? You’re not just dealing with a bit of grime you’re looking at algae that’s been sitting there for two years, black streaks baked into the surface, and potential moisture damage working its way underneath.
The truth is, wall cladding is one of the hardest-working parts of your property’s exterior. It takes everything the British weather throws at it rain, frost, pollution, coastal salt air 365 days a year. Whether you’ve got a detached home in Chelmsford or a commercial unit in Southend-on-Sea, your cladding deserves proper care. Not a half-hearted rinse with a garden hose. Proper cleaning.
This guide covers everything: how to clean wall cladding safely, how often should cladding be cleaned, what products to use, what to absolutely avoid, and when it’s time to stop DIY-ing and call in a professional team like ours at Essex Dream Clean.
Let’s get into it.
Why Regular Cladding Cleaning Is Important
Cladding that looks dirty isn’t just an eyesore it’s a warning sign.
When dirt, algae, moss, and pollutants are left to build up on exterior cladding, they don’t just sit there doing nothing. Algae and moss trap moisture against the surface. That moisture works into any small gaps, cracks, or joints. Over time, it causes swelling in timber, corrosion in metal, and discolouration in uPVC and composite materials that becomes very difficult to reverse.
Here’s what you’re actually dealing with when cladding goes uncleaned:
Dirt and dust buildup accumulates faster in urban areas and near busy roads. Combines with rain to create grimy streaks that stain the surface permanently if ignored.
Algae and moss growth thrives in damp, shaded areas. Gives cladding that green or black tinge that makes a property look decades older than it is. Algae also makes surfaces slippery if it spreads to nearby paths or windowsills.
Pollution staining especially common in towns and along main roads. Diesel particulates, carbon deposits, and industrial fallout bond to cladding surfaces and darken over time.
Moisture damage the real danger. Once water finds a way behind or under cladding, you’re looking at structural issues, mould inside wall cavities, and repair bills that make regular cleaning look very, very cheap.
Property appearance this matters more than people admit. Kerb appeal directly affects property value. Clean, well-maintained cladding signals a cared-for home. Dirty, stained cladding does the opposite.
Regular cleaning prevents all of this. It extends the lifespan of your cladding material, protects the structure behind it, and keeps your property looking sharp year-round.
How Often Should Cladding Be Cleaned?
This is one of the most common questions we get. The honest answer is: it depends on your location, your cladding material, and what it’s exposed to. But there are solid guidelines.
For most residential properties in Essex: a professional clean once every 12 to 18 months is the sweet spot. This keeps algae and dirt from establishing a stronghold while making each clean quicker and easier.
Coastal properties (think Southend-on-Sea, Mersea Island, Frinton-on-Sea): every 6 to 12 months. Salt air accelerates corrosion on metal cladding and leaves a white chalky residue on uPVC and render that builds up fast.
Urban properties near busy roads: every 12 months at minimum. Pollution deposits are heavier, and the combination of grime and vehicle exhaust creates stubborn staining.
Commercial buildings: typically every 6 to 12 months. This isn’t just about aesthetics — commercial premises reflect directly on your business. A unit covered in algae and black streaks doesn’t exactly inspire confidence in customers or clients.
Heavily shaded properties with large trees nearby: potentially every 6 months, since shade keeps surfaces damp longer and creates ideal conditions for algae growth.
Timber cladding needs more frequent attention than uPVC or composite — ideally inspected and lightly cleaned twice a year, with a deep clean annually.
The rule of thumb: if you can see it’s dirty, it’s already overdue. Don’t wait until the green is vivid and the staining is deep.
Signs Your Cladding Needs Cleaning
Watch out for these they’re your property telling you it’s time to act:
- Green or yellow algae appearing on north-facing or shaded panels
- Black streaks running vertically from fixings, gutters, or window frames
- Fading or uneven colour across panels that were once uniform
- White chalky marks from mineral deposits or salt air
- Brown watermarks below gutters or around joints
- Visible mould patches — usually dark grey or black clusters in damp corners
- Slimy texture when you run a hand over the surface
Any one of these is enough reason to book a clean. Multiple? Don’t delay.
How to Clean Wall Cladding Safely
Right, let’s get into the practical stuff. Here’s how to clean exterior wall cladding without causing damage in the process.
Step 1 – Inspect the Cladding Surface
Before you touch a drop of water, walk the full perimeter and take a proper look.
You’re checking for: cracked or loose panels, damaged sealant around windows and joints, any gaps where water could get behind the cladding, signs of existing mould or rot (particularly on timber), and rust staining on or near metal fixings.
If you find cracked panels, failed sealant, or any structural issues stop. Cleaning can wait. Water getting into an already-compromised surface during cleaning will make things significantly worse. Get the damage repaired first, then clean.
Also note the type of cladding material. The cleaning approach for uPVC is different from timber, which is different from metal or composite. Knowing what you’re working with changes everything.
Step 2 – Remove Loose Dirt and Debris
Start gentle. Use a soft brush or a low-pressure rinse to remove loose dirt, cobwebs, leaves, and surface debris before applying any cleaning solution.
Work from the top down always. This way, dirty water runs down over areas you haven’t cleaned yet rather than back over areas you have.
Don’t use a stiff-bristled brush here. You’re not scrubbing a deck you’re removing loose surface material before the main clean. Aggressive brushing at this stage can scratch uPVC and composite surfaces or raise the grain on timber.
Step 3 – Use the Right Cleaning Solution
This is where most DIY attempts go wrong. People reach for bleach because it’s cheap and available. Here’s why that’s a mistake:
Bleach (undiluted or over-concentrated) can discolour uPVC, strip protective coatings from composite cladding, and damage timber fibres. It also kills off the surface algae temporarily without addressing the root cause the algae comes straight back.
What actually works:
Soft wash solutions biocidal detergents specifically formulated for exterior surfaces. These break down organic growth (algae, moss, lichen) at a biological level rather than just bleaching it visually. The results last far longer.
Mild detergents for lighter soiling a low-concentration, pH-neutral detergent is fine for general grime on uPVC and composite panels.
Manufacturer-approved cleaners always check the manufacturer guidelines for your specific cladding product. Some composite materials, in particular, have specific cleaning product requirements that voiding your warranty if ignored.
Always test any solution on a small, inconspicuous area first. Let it dwell for 5–10 minutes and check for any discolouration or surface reaction before proceeding.
Step 4 – Wash the Cladding Carefully
Apply your chosen cleaning solution using a soft-bristle brush, a low-pressure sprayer, or a pump garden sprayer for even coverage.
Key technique points:
- Work in sections — don’t let the solution dry on the surface before you rinse
- Clean with the grain or profile of the cladding (horizontal strokes for horizontal lap cladding, vertical for vertical profiles)
- Use a soft brush to work the solution into textured surfaces without scratching
- Low-pressure washing only — we’ll cover this properly in its own section below, but the short version is: high pressure damages most cladding materials and forces water behind panels
Allow biocidal treatments adequate dwell time (usually 10–20 minutes) before rinsing. Rushing this step wastes the product.
Step 5 – Rinse and Dry Properly
Rinse thoroughly from top to bottom using clean water and low pressure. You want to remove all traces of cleaning solution residue left on the surface attracts dirt faster and can dull the appearance of uPVC and composite panels.
Pay particular attention to joints, window surrounds, and panel edges where solution can pool and leave marks.
Allow the cladding to dry naturally where possible before inspecting the result. Some staining (particularly deep algae and long-term water marks) may need a second application. Timber cladding should be allowed to dry fully before any treatment or protective coating is applied.
Best Cleaning Methods for Different Cladding Materials
Not all cladding is the same. Here’s what you need to know for each main type.
Cleaning uPVC Cladding
uPVC is the most forgiving of the lot but it still needs the right approach.
Use a pH-neutral cleaner or a dedicated uPVC cleaner. Apply with a soft cloth or soft brush, working panel by panel. Avoid abrasive pads they leave micro-scratches that dull the surface and make it look aged.
For algae and green staining, a biocidal soft wash treatment is highly effective. It lifts the organic growth without bleaching the white or grey finish. Rinse well and the result is striking uPVC genuinely comes up like new when done properly.
Avoid solvents and harsh chemicals. They can cause uPVC to become brittle over time.
Cleaning Timber Cladding
Timber is the most demanding material to clean and the most rewarding when done right.
Use a wood-safe cleaner there are specialist timber exterior wash products that clean without raising the grain or stripping protective oils. Apply with a soft brush, working with the grain direction.
Pressure washing timber is very risky. High pressure can raise the grain, drive water into the wood, and strip existing treatments. If you do use any form of pressure washing, keep it at very low PSI and maintain a good standoff distance.
After cleaning and once fully dry, timber cladding should be inspected for any areas where the protective stain, oil, or paint has worn. Re-treating promptly after cleaning keeps moisture out and extends the lifespan significantly.
Cleaning Metal Cladding
Metal cladding typically steel or aluminium is common on commercial buildings, agricultural units, and modern residential extensions.
The main concern with metal is corrosion. Any cleaning method that damages the protective coating (paint, powder coating, or anodising) opens the door to rust and oxidation.
Use a mild, pH-neutral detergent and a soft brush or cloth. Avoid highly acidic or alkaline cleaners — they attack protective coatings. Rinse immediately and thoroughly after cleaning to prevent water spotting, which is particularly visible on darker metal cladding.
For rust spots around fixings or panel edges, consult a specialist. Surface rust can be treated, but it needs to be addressed properly rather than painted over.
Cleaning Composite Cladding
Composite cladding (a mix of wood fibre and plastic) has become increasingly popular over the past decade due to its durability and low maintenance reputation. But “low maintenance” doesn’t mean “no maintenance.”
Composite surfaces can develop algae and surface mould, particularly in shaded spots. A diluted biocidal soft wash works well always check manufacturer guidance on approved cleaning products first as composite warranties are specific.
Avoid pressure washing unless the manufacturer explicitly approves it for their product. Many composite boards are hollow or have hollow channels, and high-pressure water can force its way into these areas causing internal moisture issues.
Mistakes to Avoid When Cleaning Wall Cladding
These are the errors we see regularly and fix the consequences of.
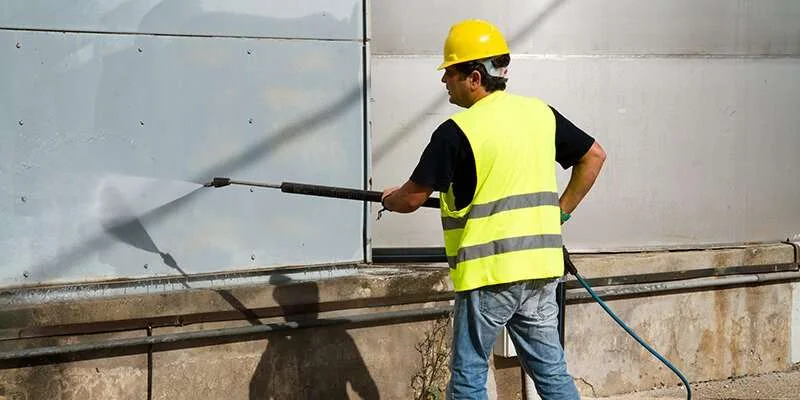
Using a pressure washer at high PSI. High-pressure washing on cladding is one of the most damaging things you can do. It drives water behind panels, strips protective coatings, damages sealants around joints and windows, and can physically crack or warp uPVC. We cover this properly in the next section.
Using undiluted bleach. Bleach can discolour, damage, and weaken cladding materials. Even when diluted, it’s not a substitute for the right cleaning product. It also doesn’t kill algae at the root it just lightens it temporarily.
Ignoring manufacturer guidelines. Every cladding product comes with specific maintenance guidance. Composite and uPVC manufacturers in particular have approved product lists. Using the wrong cleaner can void warranties and permanently damage the surface.
Abrasive brushes or scourers. These scratch surfaces, especially uPVC and composite. Scratches create areas where dirt and algae adhere more readily you’re making the problem worse long-term.
Cleaning in direct sunlight. Cleaning solutions dry out too quickly in direct sun, leaving residue and streaks. Choose an overcast day or clean early morning or evening.
Not rinsing thoroughly. Leaving cleaning product on the surface attracts dirt faster and can cause streaking or chemical residue marks.
Skipping the inspection first. Cleaning a surface with cracked panels or failed sealant can force water into places it really shouldn’t be.
Can You Pressure Wash Cladding?
This question comes up constantly, so let’s give it a straight answer.
Yes, you can but with very strict conditions. And for most cladding types, a soft wash approach is significantly safer and more effective.
Here’s the breakdown:
High-pressure washing (above 1,500 PSI) on cladding = generally a bad idea. The pressure forces water behind panels, damages sealants, strips coatings, and can crack or warp uPVC and composite boards.
Low-pressure washing (under 1,000 PSI with a wide fan nozzle and proper standoff distance) can be used carefully on certain surfaces, particularly metal and concrete-based cladding, when combined with appropriate cleaning solutions.
Soft washing is the professional standard for most cladding types. Soft washing uses low-pressure water combined with specialist biocidal detergents. The chemicals do the cleaning work not the pressure. Results are better, last longer, and carry no risk of surface damage.
At Essex Dream Clean, soft washing is our method of choice for cladding. We assess each material type before we start and select the approach that delivers the best result without risk to your property.
If you’re considering hiring someone to pressure wash your cladding, make sure they understand the difference between pressure washing and soft washing and that they know when each is appropriate.
DIY vs Professional Cladding Cleaning
You can absolutely clean your own cladding at ground level, with accessible surfaces, using the right products. For a single-storey property with minimal algae growth, a DIY approach is perfectly viable.
But here’s where it gets more complicated:
Height. Anything above ground level becomes a safety issue very quickly. Ladders are involved, and cleaning at height requires both the right equipment and someone who knows how to use it safely. Scaffolding or access equipment for multi-storey properties is a significant undertaking.
Equipment. Professional soft washing equipment isn’t something most homeowners own. Specialist biocidal chemicals aren’t sold in B&Q. Getting a genuinely good result requires access to the right tools.
Large surface areas. Commercial buildings, warehouses, and larger residential properties have significant square footage of cladding. Covering it properly and consistently takes time and the right volume of equipment.
Stubborn staining. Long-term algae, deep black streaks, and ingrained pollution staining often need a professional-grade biocidal treatment with extended dwell time. Consumer products simply aren’t as concentrated or effective.
Time. A professional team will complete what would take a homeowner a full weekend in a matter of hours.
For most commercial properties and any residential property above single storey, professional cleaning is simply the right call for safety, for results, and for time.
Professional Cladding Cleaning Services
At Essex Dream Clean, we provide specialist exterior cladding cleaning services across the whole of Essex from Basildon to Braintree, Harlow to Harwich, and everywhere in between.
Here’s what working with us looks like:
Initial inspection we assess your cladding material, the extent of soiling, and any areas of concern (damage, failed sealant, structural issues) before we start.
Soft washing as standard our method for the vast majority of cladding types. Low pressure, specialist biocidal detergents, thorough rinse. No damage risk, excellent results.
Material-specific approach we don’t use the same method on uPVC as we do on timber or metal. Every material gets the right treatment.
Commercial and residential we work with homeowners, letting agents, property managers, and commercial clients. Whether it’s a terraced house in Colchester or a warehouse unit in Thurrock, we’ve got you covered.
Scheduled maintenance plans for commercial clients and homeowners who want to stay on top of things, we offer scheduled cleaning plans that keep your cladding consistently clean year-round without you having to think about it.
5-star results our Google reviews speak for themselves. We don’t consider a job done until the results genuinely impress.
Ready to book? Call us on 07482713521, email essexdreamclean@gmail.com, or use the contact form at essexdreamclean.
Final Thoughts on Cleaning Wall Cladding
Wall cladding cleaning isn’t complicated but it does need to be done right. The wrong method, the wrong product, or leaving it too long can turn a straightforward maintenance task into an expensive repair job.
To summarise the key points: clean your cladding every 12 to 18 months as a minimum (more frequently in coastal and urban areas), use the right product for your material type, always work top to bottom, and avoid high-pressure washing unless you’re certain it’s safe for your specific surface.
When in doubt or when the job is above single-storey height, covers a large area, or involves stubborn organic staining call a professional. In Essex, that means Essex Dream Clean. We know cladding, we know the local environment, and we know how to get results that last.
Don’t let your cladding become someone else’s before-and-after photo. Get it cleaned properly.
Frequently Asked Questions
For most cladding types, the best approach is a soft wash biocidal detergent applied at low pressure. These specialist exterior cleaning solutions break down algae, moss, and organic staining at a biological level, producing results that last far longer than bleach or standard household cleaners. For light soiling, a pH-neutral detergent applied with a soft brush works well on uPVC and composite. Always check manufacturer guidelines for your specific cladding product before applying any cleaner.
It can, but with important caveats. High-pressure washing typically anything above 1,500 PSI is not recommended for most cladding types. It risks forcing water behind panels, damaging sealants, and stripping protective coatings from uPVC and composite boards. The professional alternative is soft washing: low-pressure water combined with specialist biocidal chemicals that do the heavy lifting without the pressure risks. This is the method used by professional exterior cleaning teams like Essex Dream Clean.
For a typical residential property, a professional cladding clean takes between 2 and 6 hours depending on the size of the property, the type of cladding, and the extent of soiling. Commercial buildings naturally take longer a large warehouse or multi-storey unit could be a full-day or multi-day job. For DIY cleans at ground level, factor in significantly more time, particularly if you’re applying a biocidal treatment that requires dwell time before rinsing.
Yes, significantly. Algae and moss trap moisture against the cladding surface, which accelerates degradation particularly in timber and metal. Left unchecked, this moisture works into joints and fixings, causing rot, corrosion, and structural issues behind the cladding that are expensive to fix. Regular cleaning removes these biological growths before they take hold, keeping the surface dry and intact. In practical terms, properly maintained cladding can last decades longer than neglected cladding of the same material.